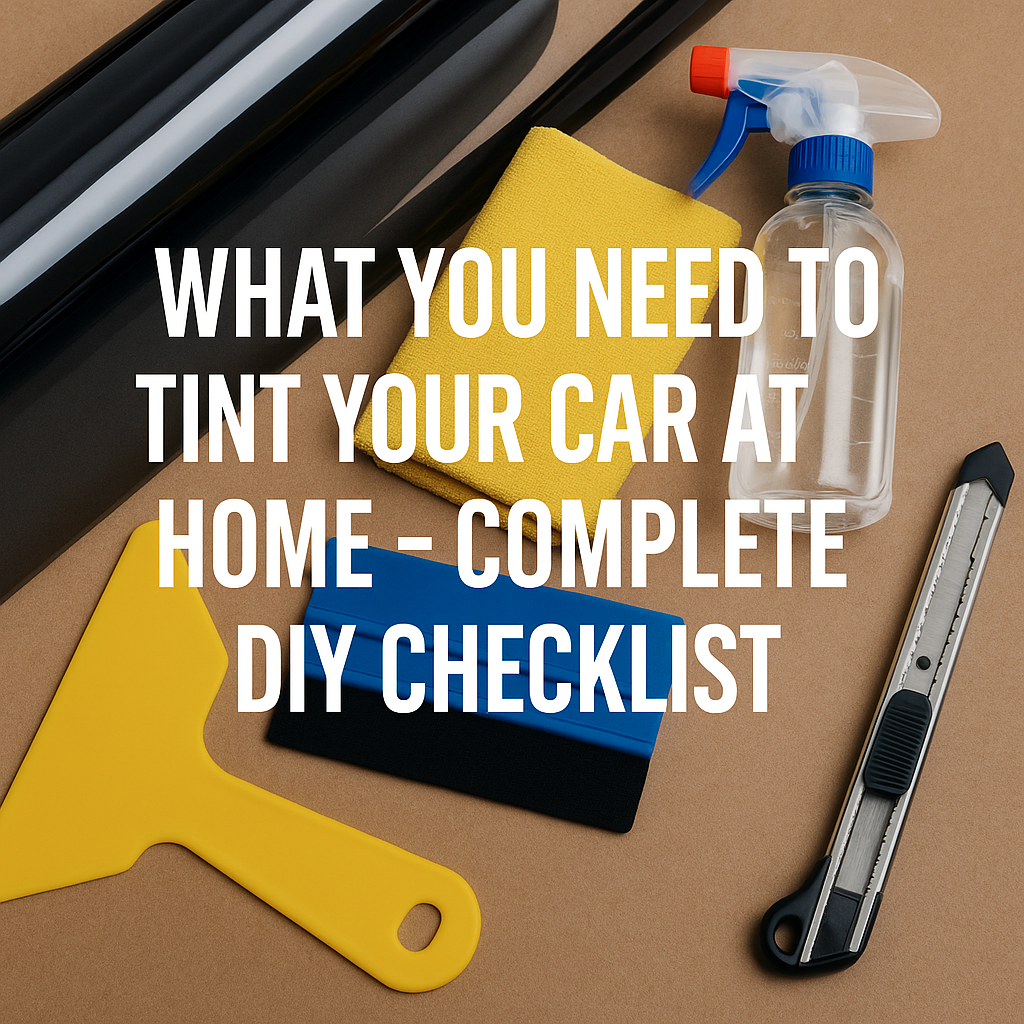
What You Need to Tint Your Car at Home: The Complete DIY Checklist
So you've decided to tackle window tinting as your next weekend project. Smart choice! With a TrueLine precision-cut kit and the right preparation, you can achieve professional-looking results without the professional price tag. This complete checklist covers everything you'll need to ensure your DIY tinting project goes smoothly from start to finish.
Setting Yourself Up for Success: The Right Environment
Before gathering your tools, make sure you have the ideal workspace:
Workspace Requirements:
- Enclosed, dust-free area (garage or covered space)
- Temperature-controlled environment (70-80°F/21-27°C ideal)
- Sufficient lighting (overhead lighting plus a portable work light)
- Access to electrical outlets (for heat gun and other tools)
- Enough space to move around your vehicle (min. 3ft/1m on all sides)
Pro Tip: Schedule your installation for early morning when dust levels are typically lower and you'll have a full day to complete the project without rushing.
Essential Tools for DIY Window Tinting
Having the right tools makes all the difference between frustration and satisfaction. Here's your must-have equipment list:
Basic Application Tools:
- Heat-resistant spray bottle filled with soapy application solution
- Hard card squeegee for initial application (included in TrueLine kits)
- Soft-edge squeegee for final smoothing and edge work
- Microfiber towels (at least 6-8, lint-free and clean)
- Lint-free cleaning cloths specifically for glass preparation
- Sharp utility knife with extra blades (for any minor adjustments)
- Heat gun or hair dryer for working with curved surfaces
Window Preparation Tools:
- Glass cleaner (ammonia-free to protect rear defroster lines)
- 70% isopropyl alcohol for final cleaning
- Stainless steel razor blade scraper for removing old decals or adhesive
- Clay bar for removing embedded contaminants
- Clean spray bottle with distilled water for final rinse
Convenience Items:
- Nitrile gloves to prevent fingerprints
- Small spray bottle of application solution for quick touch-ups
- Timer or stopwatch to track drying intervals
- Small hand towel to protect your knees when working on lower windows
- Painter's tape for temporarily securing film during positioning
Step-by-Step Preparation Checklist
1-2 Days Before Installation:
- Thoroughly wash your vehicle to remove exterior dirt and contaminants
- Check weather forecast to ensure a calm, dust-free day
- Pre-clean interior glass with ammonia-free glass cleaner
- Test all windows to ensure they operate smoothly
- Read through the entire installation guide that comes with your TrueLine kit
- Watch TrueLine's installation video for your specific vehicle type
- Prepare your workspace by sweeping and dampening the floor to reduce dust
Morning of Installation:
- Final interior cleaning of all glass surfaces:
- Clean with glass cleaner
- Follow with alcohol wipe to remove any residue
- Check for missed spots in direct light
- Mix your application solution (1-2 drops of baby shampoo per 32oz of water)
- Lay out all tools in an organized, accessible manner
- Unbox and identify all film pieces from your TrueLine kit
- Turn off all ventilation/fans to prevent dust circulation
- Put on lint-free clothing (avoid fuzzy sweaters or lint-producing fabrics)
Pro Tip: Some professional installers lightly mist the work area floor with water before beginning to keep dust from circulating during the installation process.
Common Mistakes to Avoid
The Cleanliness Factor:
- Insufficient cleaning: 90% of bubble problems come from inadequate glass preparation
- Using regular towels: Regular cloths leave invisible lint that creates bubbles
- Contaminated solution: Always use clean spray bottles and filtered water
- Touching the adhesive: Handle film only by the edges or backing
The Technical Details:
- Rushing the process: Allocate 3-4 hours for your first installation
- Incorrect solution mix: Too much soap prevents proper adhesion
- Working in direct sunlight: Heat causes film to adhere too quickly
- Not using enough solution: Dry spots lead to improper adhesion and bubbles
The Optimal Installation Order
For best results, follow this window sequence:
- Start with rear window (typically the most challenging)
- Move to rear side windows (smaller and easier)
- Front side windows next
- Finish with small quarter windows (if applicable)
This sequence allows you to gain confidence as you progress from more difficult to easier applications.
Post-Installation Care
- Keep windows up for at least 3-5 days (longer in humid areas)
- Avoid washing your vehicle for at least 7 days
- Expect some water bubbles – these will disappear as the film cures
- Note any persistent bubbles after 14 days (these may require attention)
- Take photos of your completed work to share and compare
The TrueLine Advantage for First-Timers
Unlike generic tint kits, TrueLine's precision pre-cut tint kits offer several advantages that make your first DIY installation much more likely to succeed:
- Pre-cut to exact specifications – no measuring or trimming required
- Labeled pieces for easy identification
- Installation sequence guide specific to your vehicle
- Premium film quality that's more forgiving during installation
- Enhanced adhesive technology allowing for repositioning during installation
Your DIY Installation Timeline
For planning purposes, here's a realistic timeline:
- Preparation and cleaning: 30-45 minutes
- Rear window installation: 45-60 minutes
- Each side window: 20-30 minutes each
- Final adjustments and cleanup: 30 minutes
- Total time for first-time installer: Approximately 3-4 hours
From Purchase to Completion: Your Roadmap
- Order your TrueLine precision-cut kit by selecting your exact vehicle
- Gather all necessary tools using this checklist
- Prepare your workspace and vehicle
- Follow TrueLine's vehicle-specific installation guide
- Allow proper curing time
- Enjoy your professional-looking results and cooler interior
Ready to get started? Find your vehicle's exact precision-cut kit and transform your ride this weekend!